Forms
Collect contact details, enquiries and support requests directly in website chat. Create a form, publish it and handle responses with the conversation in view.
Before you start
Forms work in the website widget on every plan when Forms are available for your assistant. Your plan determines the number of form slots. During an active trial, the separate trial limit applies.
Owners and Editors manage forms and erase submitted values. Operators can read responses and update their processing status.
Sending a form manually also requires human takeover, available on Pro, Business and during a trial.
With Webhooks access, you can also forward submitted answers to your own systems. Follow the form webhook setup below.
Create your first form
Select the right assistant in the dashboard, then open Forms.
- Choose New formSelect a template or Blank form. You can enter an internal name or keep the template name. Only your team sees this name.
- Build the ContentAdd fields, edit their labels and mark required answers. Drag blocks to arrange them, or use each block’s movement buttons.
- Complete SettingsSet the public title, submit button text and confirmation message. Add the label and HTTPS URL for your own privacy notice.
- Preview and publishCheck Preview, wait for Saved and choose Publish. Visitors can then receive the published form. Later edits need Publish changes.
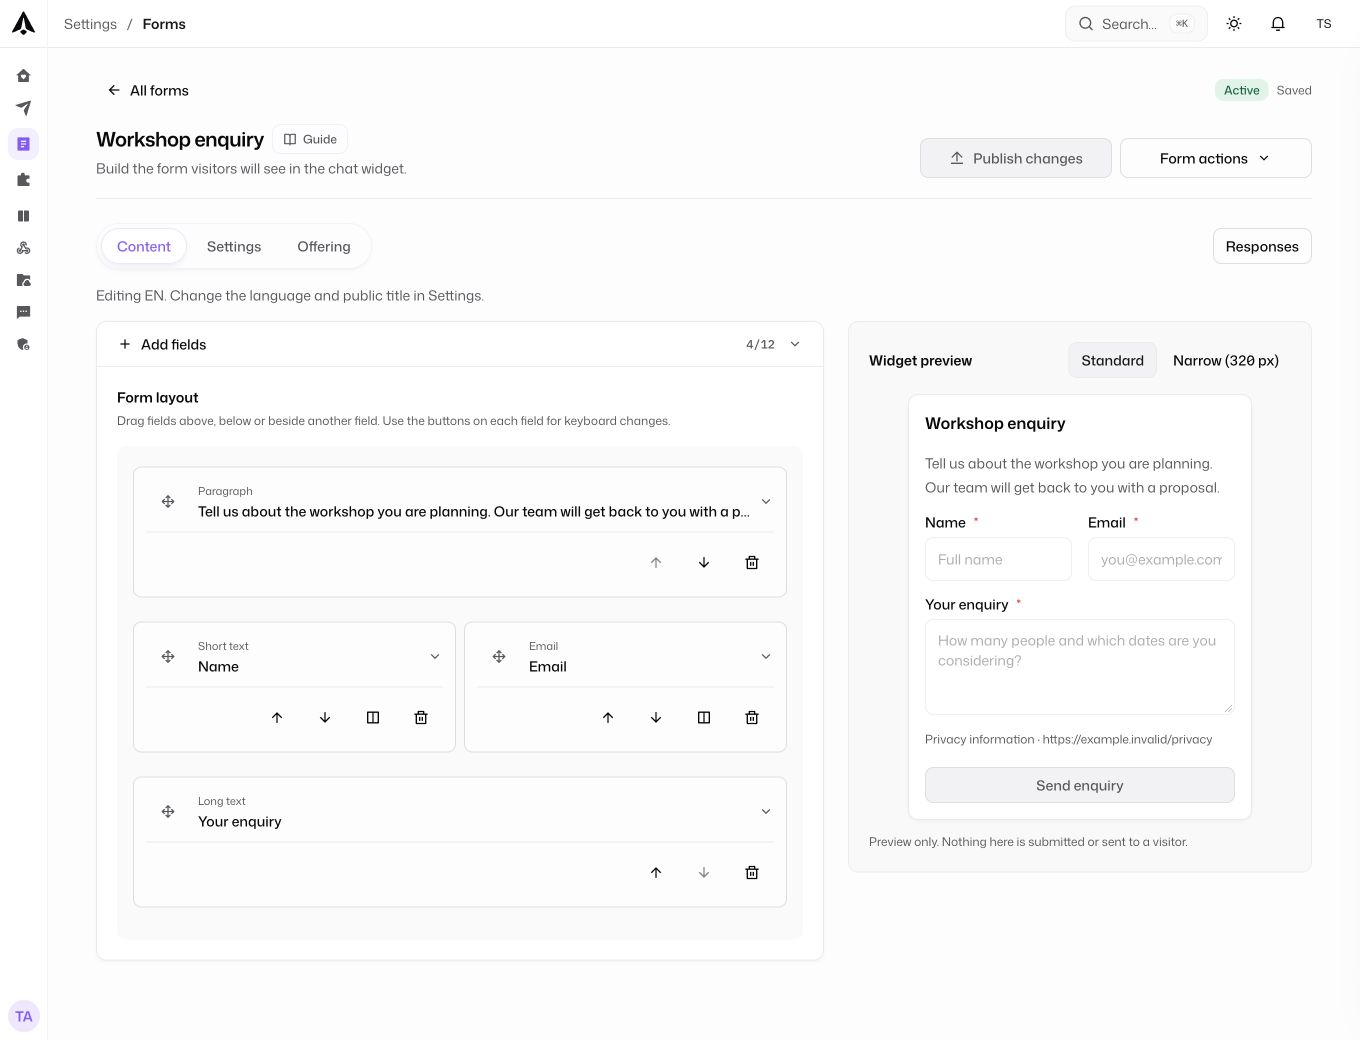
Choose the fields you need
Ask only for details your team needs to handle the request.
- Heading and paragraph
- Explain what the form is for. These blocks display text and do not collect an answer.
- Short and long text
- Use short text for a name or reference, and long text for a description.
- Email and phone
- Collect the contact details your team needs for a reply.
- Date
- Let the visitor enter a date, such as their preferred appointment day.
- Single choice
- Offer up to 8 options as a dropdown or choice buttons. The visitor selects one.
- Checkbox
- Ask for a single confirmation. A required checkbox must be checked before submission.
A form supports up to 12 blocks, including headings and paragraphs. Place up to two input fields in one row. Headings and paragraphs use the full row.
Saving a draft and publishing
The editor saves your draft automatically. Visitors keep seeing the last published version until you choose Publish changes.
Offer a form in website chat
Forms belong to the selected assistant. Both automatic and manual offers are available in website conversations only.
Let AI choose a suitable moment
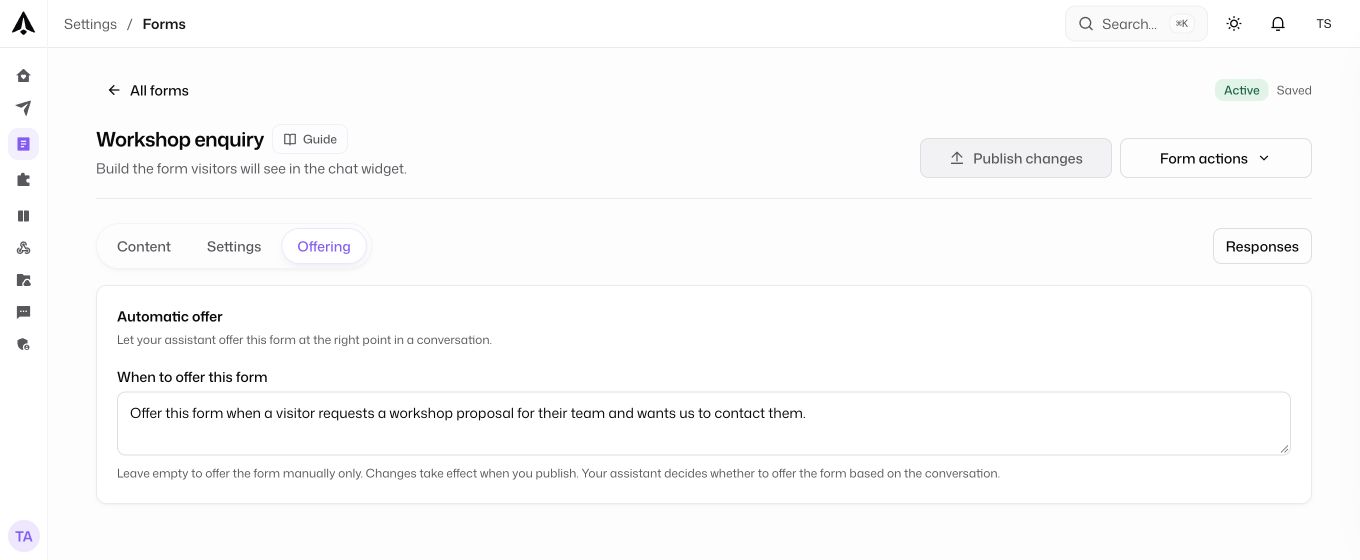
In Offering, describe When to offer this form, then publish the changes. The assistant decides from the conversation whether the form is appropriate. Leaving this field empty means manual offers only.
Send a form yourself
- Take control of the conversationOpen a live website conversation and take control. You must be the operator currently controlling it.
- Choose Insert formSelect an active, published form for this assistant and choose its language.
- Choose Send formThe form appears in the visitor’s chat. Their response becomes available after they submit it.
Manual sending requires human takeover on Pro, Business or an active trial. Another operator’s conversation must be handed over before you can send a form.
Prepare language versions
Available languages follow the assistant’s language settings. Translate the form content yourself; translations are not generated automatically.
- Complete the default languageEdit shared fields, layout, required answers and the privacy notice URL here. Every translation uses this structure.
- Fill in each translationSelect another language. Translate the public title, labels, options, placeholders, submit button, confirmation message and privacy link label.
- Review before publishingChoose Confirm translation reviewed. Publish the Ready languages. Changes to the original text may require another review.
Read and process responses
Open Responses for a form, or view the submitted form in its related conversation.
- Find a responseSwitch between Pending, Processed and All. The table shows up to three answer fields; open the detail for every value.
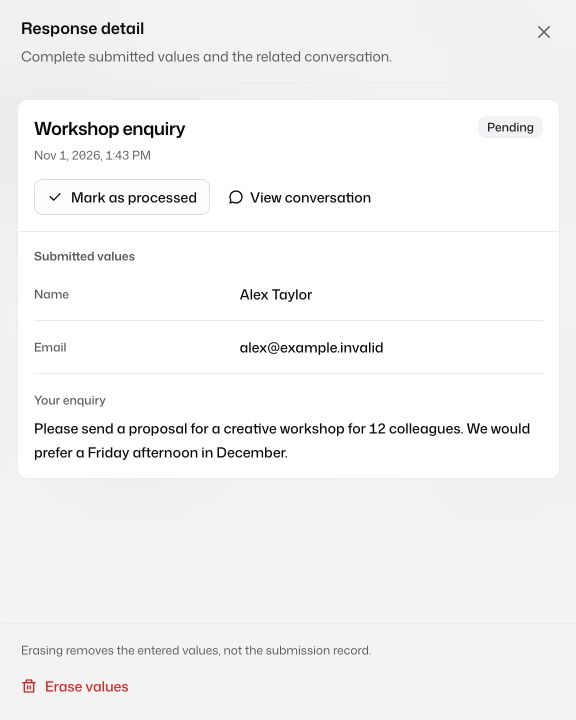
- Read the full requestOpen detail and use View conversation to read the context. Submitted values stay separate from the AI conversation.
- Update the processing statusChoose Mark as processed when your team has handled the request, or Return to pending. You can also update selected responses together.
Send responses to a webhook
Connect forms to your CRM, Make, Zapier or another receiver using the existing outgoing Webhooks. Webhooks require Standard or higher, an active trial or another access grant, even though Forms are available on every plan.
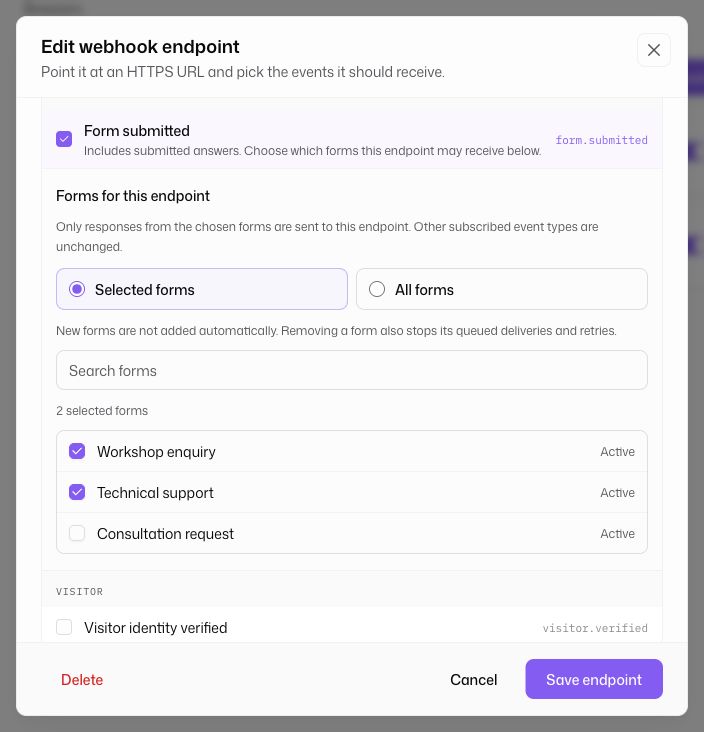
- Configure the receiverSelect the same assistant, open Webhooks and create or edit an endpoint. Enter the HTTPS URL supplied by your receiving system.
- Choose the forms to sendIn Forms, select Form submitted (form.submitted). Then choose Selected forms and check the forms this endpoint should receive, or explicitly choose All forms. All forms also includes forms you create later; Selected forms does not. Save the endpoint. Responses from unselected forms are not sent to it.
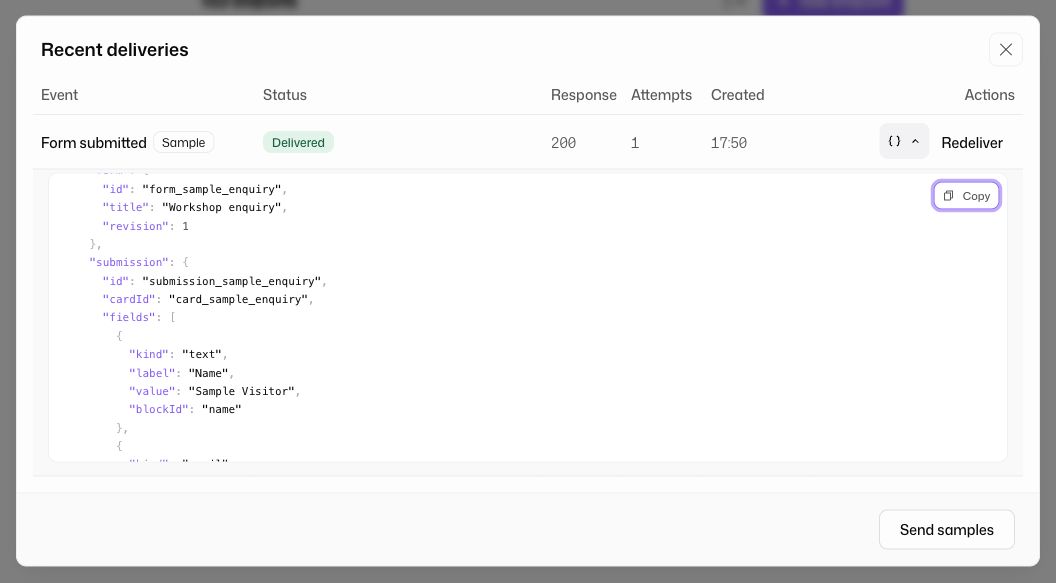
- Send samples, then test a real submissionUse Send samples to map the fictional payload in your receiver. Then submit a published form using fictional details in a website chat and check the delivery history. Deduplicate by the event id because retries can deliver the same event again.
Protect submitted details
Published forms require a link to your own data-processing information: a label and a valid HTTPS URL without login credentials. A privacy notice is not consent to processing. Avoid asking for passwords or payment details.
Submitted answers remain outside the AI assistant’s context. AI can receive the submission status, not the entered values. Team access follows workspace roles.
Pause, archive or remove a form
- Pause
- Stop accepting responses temporarily. Already offered, unsubmitted forms close. Resuming allows new offers; old cards stay closed.
- Archive
- Stop collection and free a form slot. Existing responses remain available.
- Restore, then resume
- Restore an archived form if a slot is available. It returns paused; choose Resume when you want to accept new responses.
- Delete permanently
- Archive the form first, then confirm deletion by typing its name. This irreversibly removes the form, cards and responses. Conversation and billing records remain.
If something does not work
- A form is missing from the offer list
- Check the selected assistant, publication and active status, plan and Forms availability. Manual sending also requires control of a website conversation.
- The form will not publish
- Follow the validation errors. Check input fields, labels, choices, privacy link and the completeness of the default language.
- The visitor sees the default language
- Check that the requested language is enabled for the assistant, complete, reviewed and published. Otherwise the default language is used.
- Changes have not saved
- Keep the editor open and use Retry save. For a version conflict, choose whether to keep your local draft or load the server version. Loading the server version replaces your local edits. Wait for Saved before leaving.